General Usage Instructions
1. The Main 7CADREBARSCHEDULE window
You can run the app directly from desktop, or within AutoCAD as an add-in for AutoCAD.
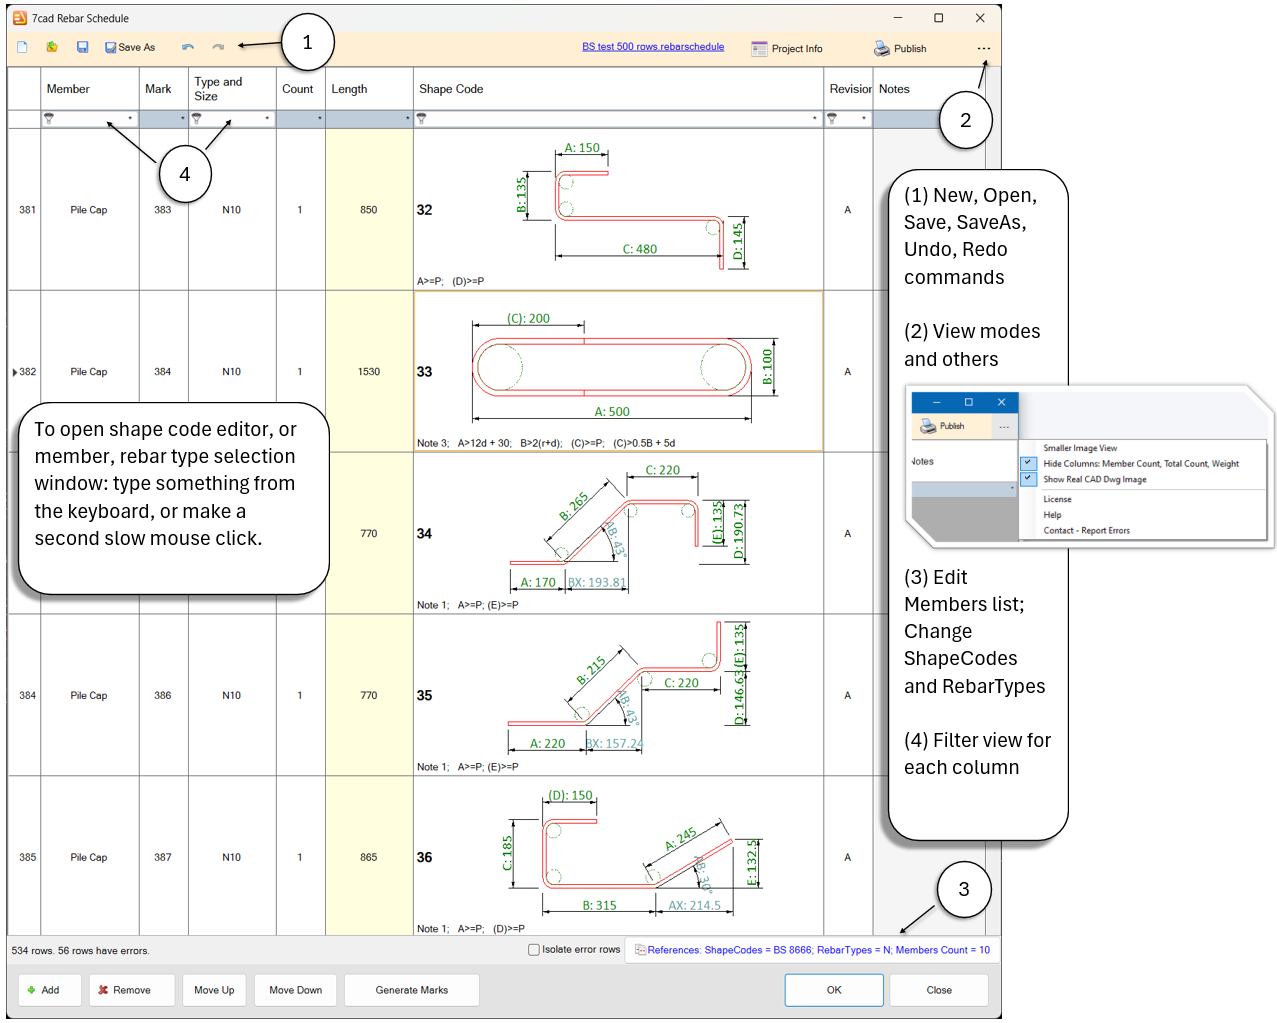
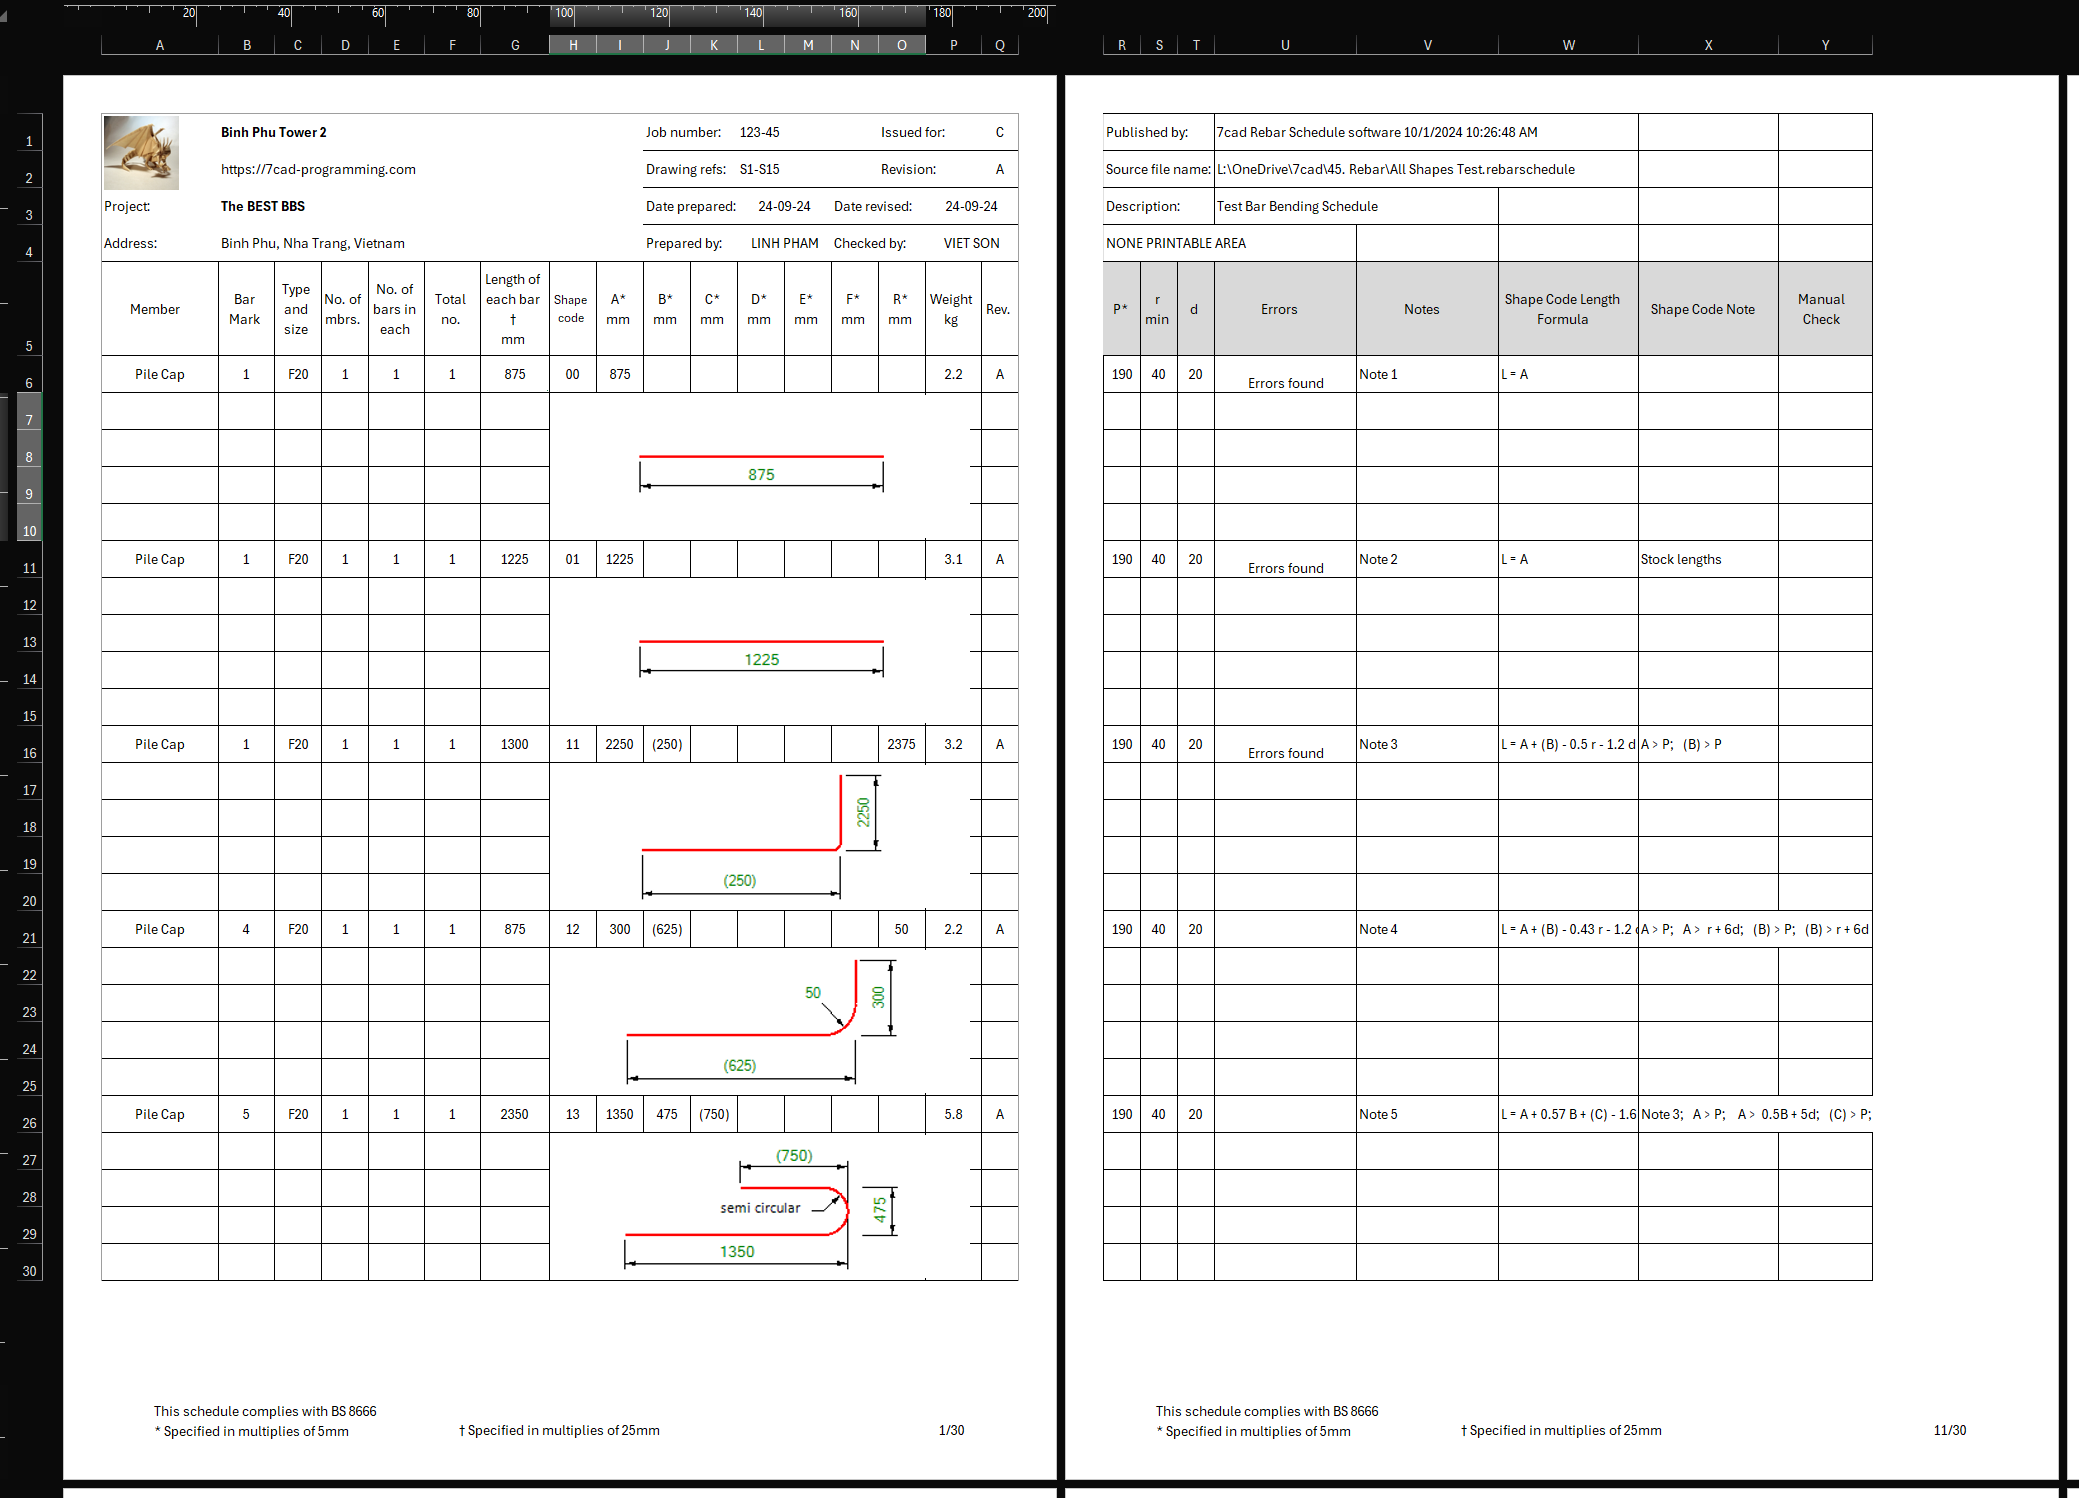
Look at the top menu, you can see the familiar New, Open, Save, SaveAs, and Undo/Redo buttons. Each rebar schedules is a document, saved to an external .rebarschedule files.
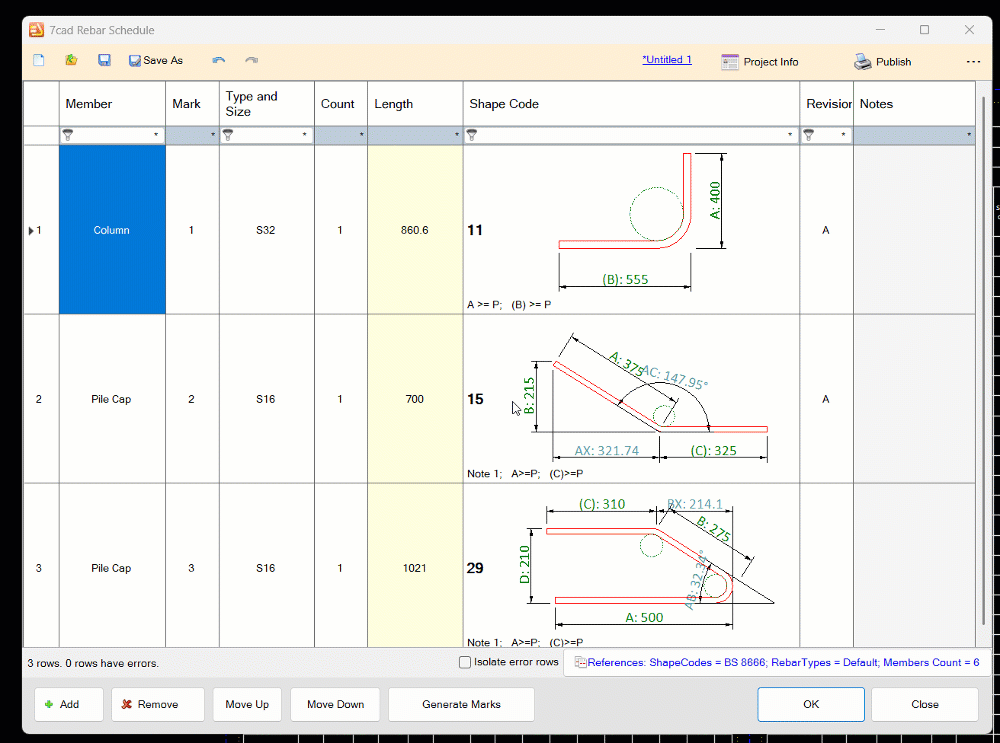
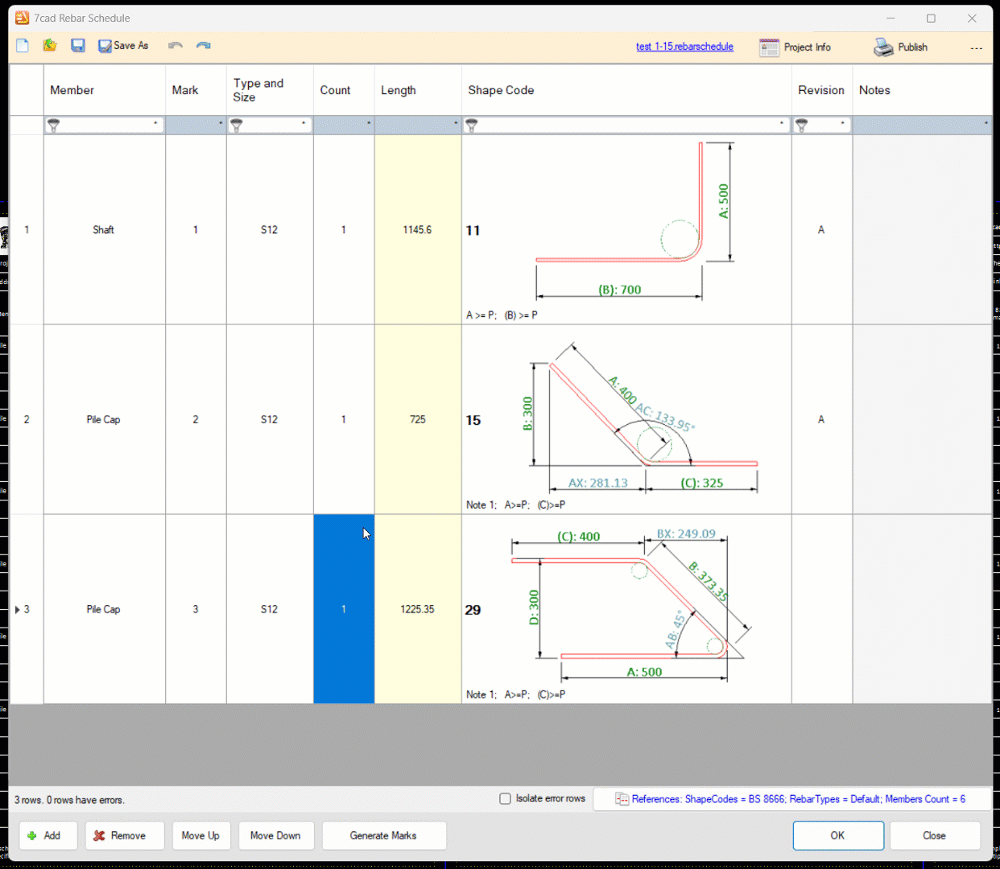
Once a rebar schedule is created or open, it will show up in the editing spreadsheet. Click the Add or Remove buttons at the bottom to add or remove rows. To edit the shape, select the shape cell, then click the cell again, or type any key, to bring up the shape editing window.
Then you can use your mouse or your keyboard's up/down arrow keys to navigate through the editing window and change parameters A, B, C, etc. (see the gif video screenshot below). A "Real CAD" drawing preview will be generated for you to check the editing rebar. You can also change the shape code by clicking on the "Select Other Shape" button. Length will be automatically calculated and criterias are automatically checked. Press enter or just click back to the spreadsheet to confirm changes. Press the ESC key to cancel changes.
For member cell and rebar type cell, you can select, then use a second mouse click, or type any key. Then a menu of members or rebar types will bring up for you to select.
More commands for you to explore are: filter buttons for columns; the "Generate Marks" command button; the "References ..." button; the "Project Info" button, and the "Publish" button.
2. License
If you purchase or start a trial period of the app via Autodesk Store, then the app will run without any restriction, as long as you login your AutoCAD with the same user ID who makes the purchase, or starts the trial.
Otherwise, without a license, the app is in trial mode. Trial mode is supposed for evaluating purpose only. It is restricted to run in about 30 AutoCAD sessions. After that, you need to buy a license.
The app can be advanced for more features, more shape codes and units supported. Contact me at linh@7cad-programming.com for custom programming service if you interest.
Screenshots

More Details Instructions
1. Understand the how the 7cad Rebar Schedule manage files and folders
1.1 Working folder: Rebar schedules are saved as ".rebarschedule" files in this folder. Most often, this is the folder of your CAD drawings.
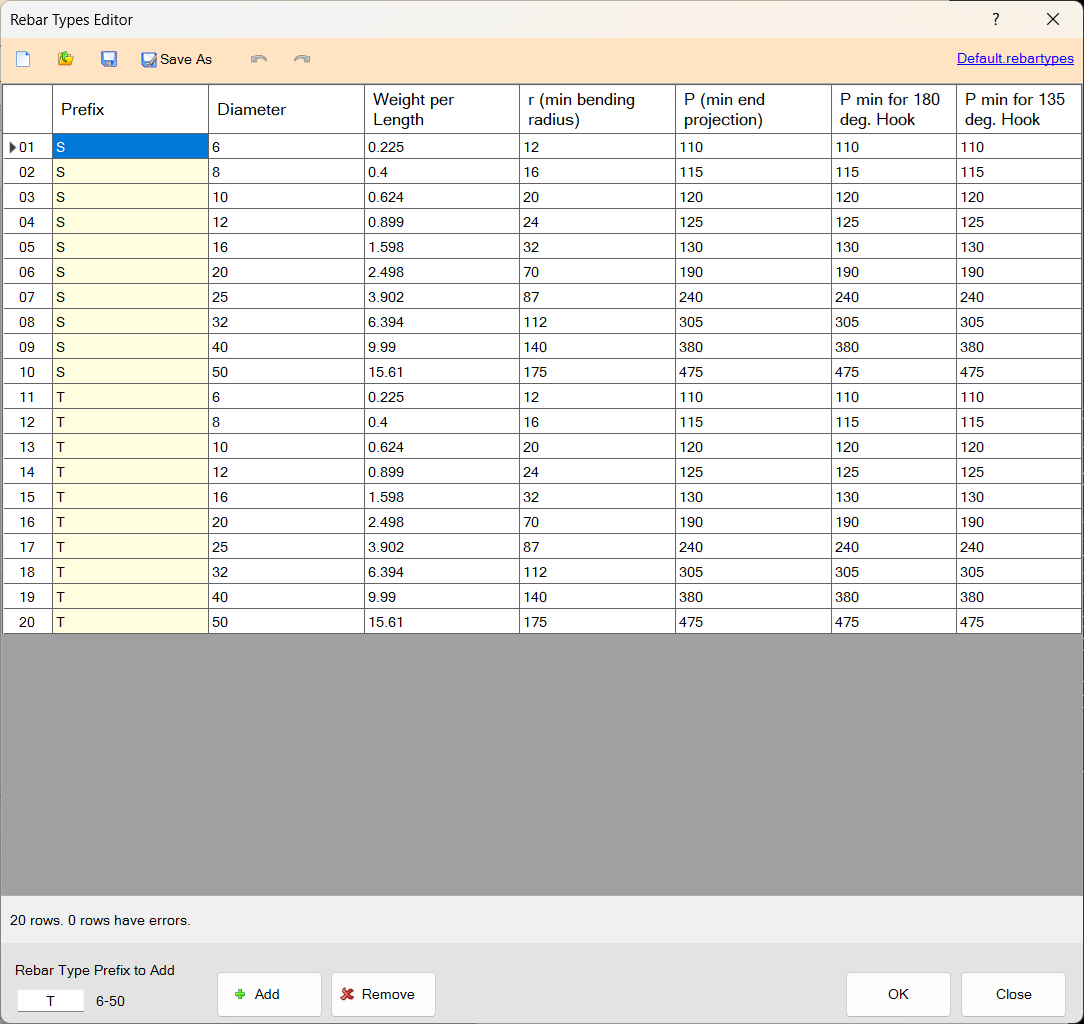
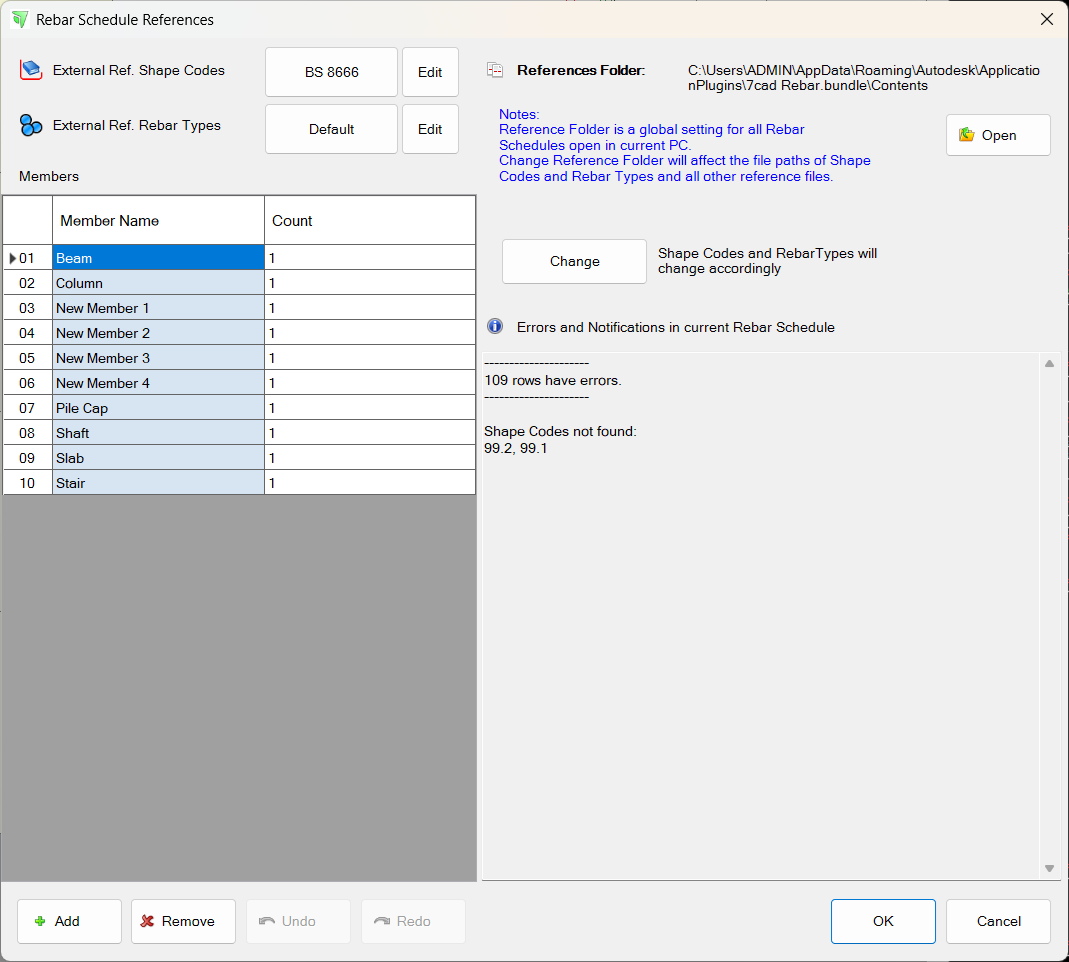
1.2 References folder: This folder contains ".shapecodes" and ".rebartypes" files, which are external reference files. Change this folder location will affect all your rebar schedules in your PC. By default, References folder is the app's content folder. If you customize shapecodes and rebartypes files, you should save them to a shared folder and set it as References folder so all your users can access the same references files.
To change references folder, open or create a new rebar schedule, then click "References ..." button at the bottom right corner of the spreadsheet.
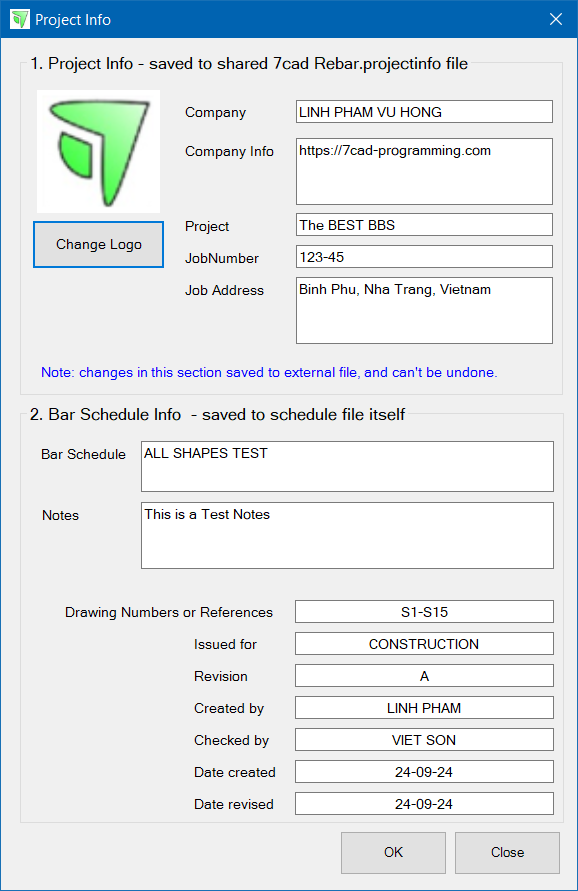
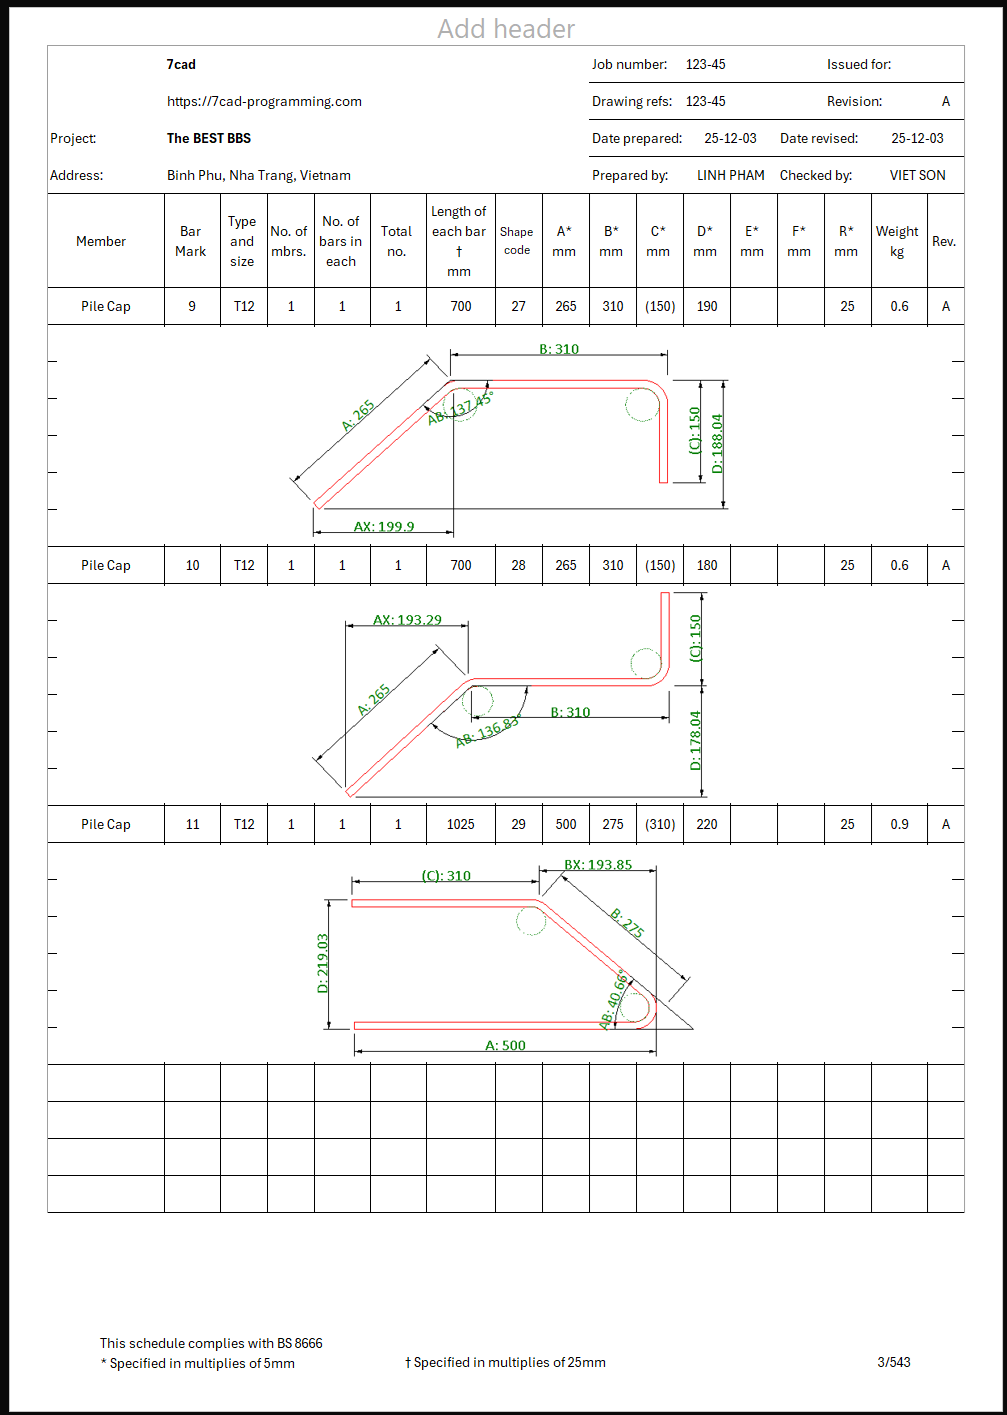
1.3 Project info: Project info first part is saved to 7cad Rebar.projectinfo file in your working folder. Therefore, changes in project info's company name, company logo, project name, etc. will be populate to all rebar schedule within the working folder. On the other hand, Project info second part, like drawing number or references, revision, created by and checked by etc., are saved to the rebar schedule document itself.
2. More commands on the 7CADREBARSCHEDULE spreadsheet
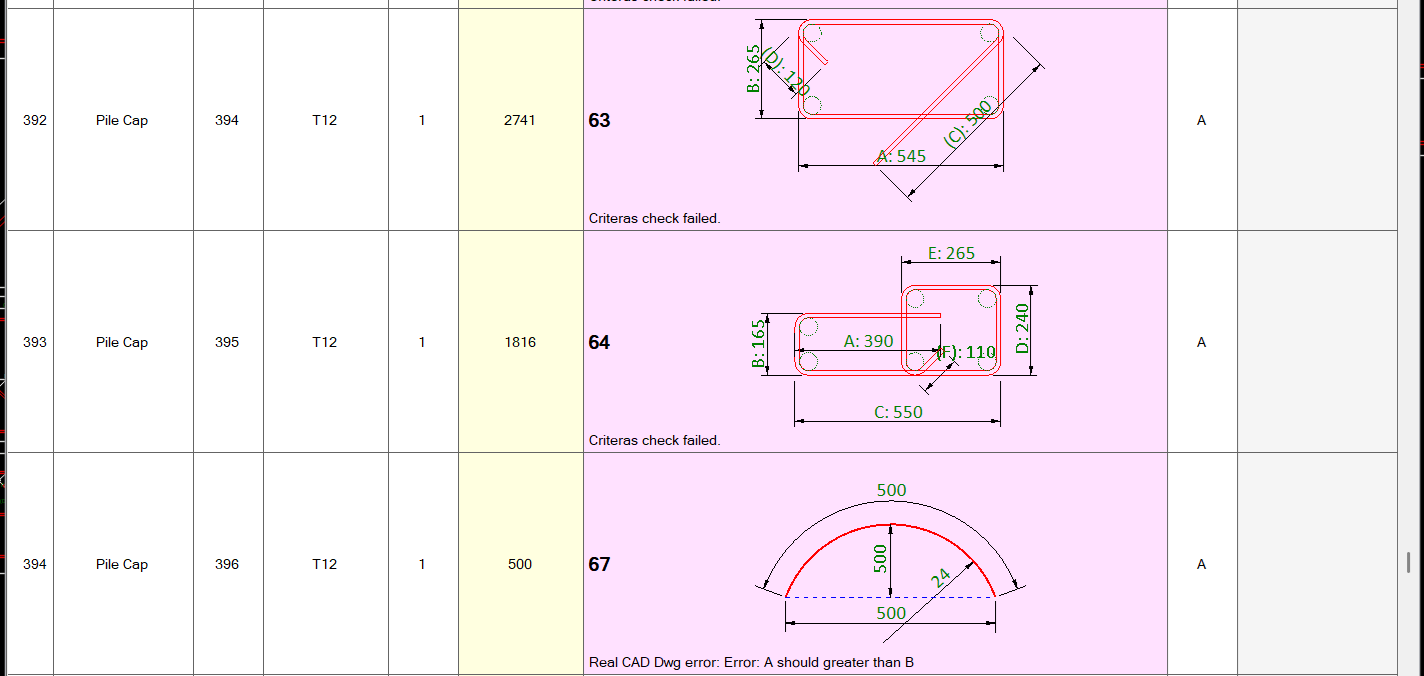
Adding, removing, and editing rebar schedule rows are made easy as described in the above section. Anytime, you can undo or redo changes by clicking the Undo/Redo button or simply pressing the Ctrl Z/Ctrl Y keys. The rebar schedule row can have errors, and if it has, cells will be marked up with pink color.
Common errors are: member not found, rebar type not found, shape code not found, Real CAD Dwg generator fails and/or duplicated marks.
Copy and Paste are supported in the 7cad Rebar Schedule spreadsheet. To copy the whole rebars and paste them to other schedule, select the whole rows then right click for Copy command.
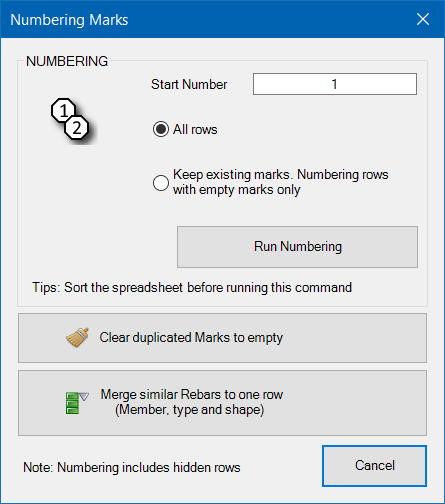
Generate Marks command window: see in screenshots. You can renumber all marks with a click on the "Run Numbering" button.
Advanced command in this window is "Merge similar Rebars to one row". It is when there is more than one row of rebars that have the same member, rebar type, and shape, then they should be merged into one record, and the count fields should be summed up.
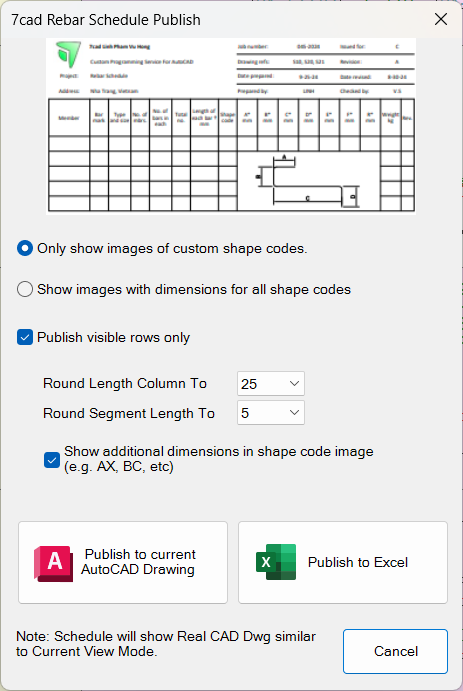
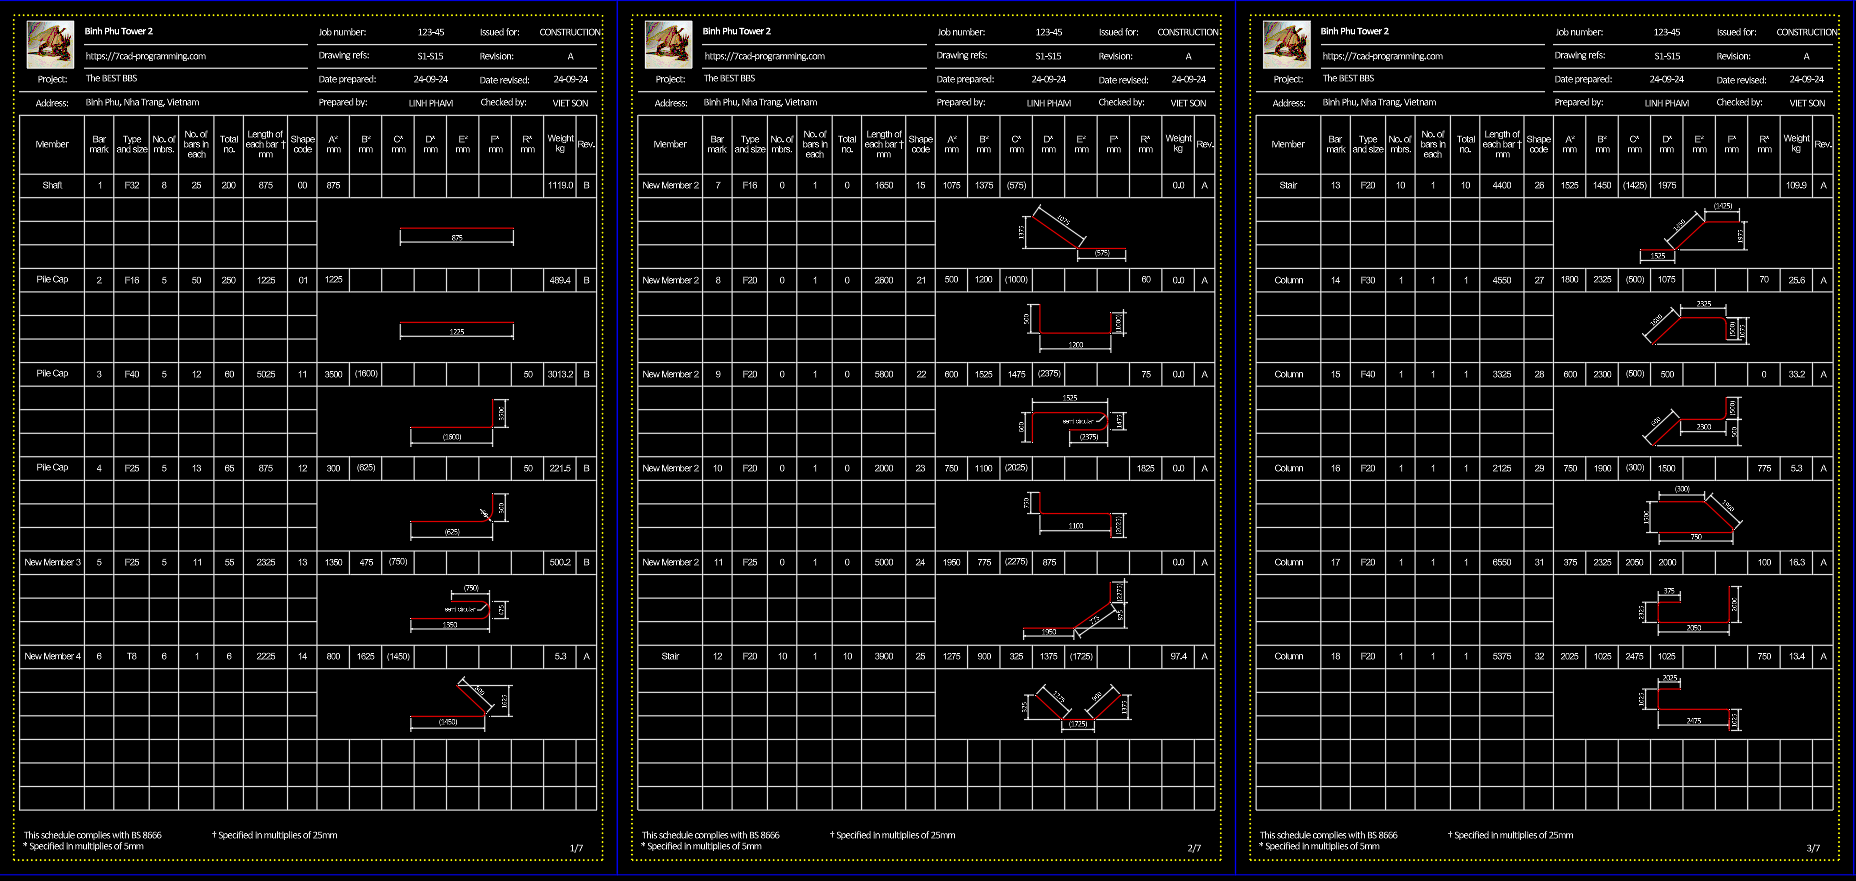
Publish commands: you can publish the rebar schedule to AutoCAD or Excel for print. If current view mode is showing Real CAD Dwg, then the publishing result will show real cad drawing. If current view mode is not Real CAD Dwg, publishing result will show the shape code definition images.
Commands
| Ribbon/Toolbar Icon | Command | Command Description |
|---|---|---|

|
7cadRebarSchedule |
Create, edit and publish a Bar Bending Schedule file |

|
7cadRebarActivation |
Open license activation window. |
Version History
| Version Number | Version Description |
|---|---|
|
2.0 |
Generates Real CAD Drawings at run time. 7cad framework updated. |
|
1.0 |
Initial public release. |